SankeyMATIC Manual
Topic Index
Colors
Setting Colors for All Nodes
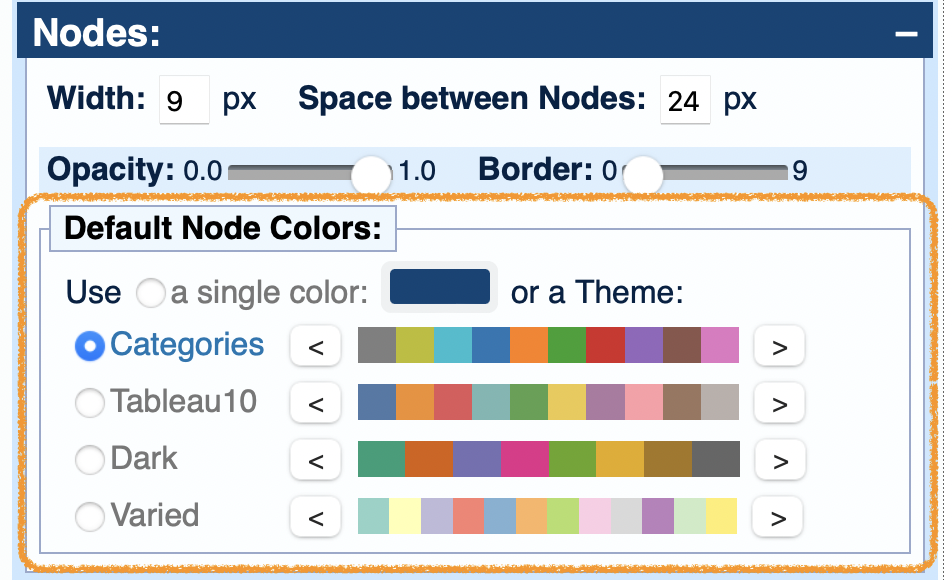
When you want to automatically assign a set of complementary colors to your Nodes, SankeyMATIC has four built-in color themes to choose from:
Categories (10 colors), Tableau10 (10), Dark (8), and Varied (12).
These are based on the d3.js 'categorical' color scales, which you can read more about on GitHub.
You can rotate the colors within a theme so that SankeyMATIC will start assigning colors from any point in the list that you choose.
Click the "<" and ">" buttons for your selected theme to adjust the starting point.
Every color in every theme will reveal its color code when you hover over it.
This is handy if you want to adopt one specific color in your inputs.
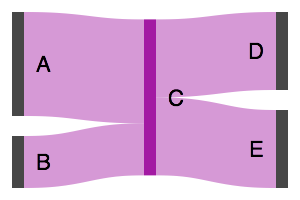
Example:

Setting Colors for All Flows
In the Colors control panel, for Flow Colors you have three options for how Flows will be colored by default:
- Use the Source Node's color: Every Flow will adopt the color of the Node it flows from.
- Use the Target Node's color: Every Flow will adopt the color of the Node it flows to.
- Use a single color for all flows.
Note: Since Flows are more transparent than Nodes by default, a color code applied to a Flow will appear to be a lightened version of the same color applied to a Node.
Using a single color (gray here)
Using Source colors
Using Target colors
To control the opacity (or transparency) of all Flows, use the “Flow Opacity” slider.
The closer the Opacity value is to 1.0, the brighter the colors will be. However, if any Flows cross over each other, a higher opacity will make it harder to distinguish them from each other.
Setting Individual Node Colors
You can set one specific Node's color by adding a Node definition line to the “Inputs” field, in this format:
:Node-name #Color
:Surplus #006600
Note: Node definition lines can occur anywhere in the input; they are not required to be in a specific order.
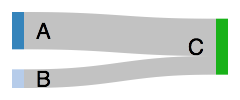
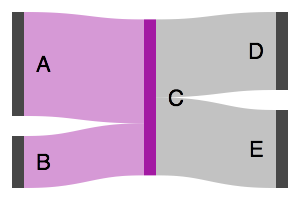
Example: Set the Node color for “A” to red (#CC0000) and for “C” to green:

Setting Individual Flow Colors & Opacity
You can set one specific Flow's color by adding a color code to the end of that Flow's data line, like so:
Source [Number] Target #Color
To customize the opacity of an individual Flow, attach to the end of the Flow's color code a number between .0 and .9999:
Source [Number] Target #Color.Opacity
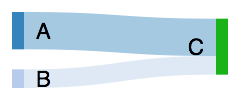
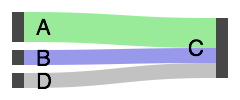
Example: Set the first Flow to green, the second to blue, and leave the third with its default (gray) color:
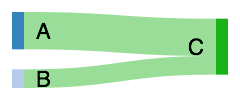
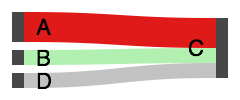
Example: Set the first Flow to red with .9 opacity, set the second to green with .4 opacity, and leave the third with its default appearance:
Setting Flow Colors to Inherit from Specific Nodes
You can override the general settings for Flow colors for a specific Node by using these special tokens in your Node data lines:
>> = use this Node's color for Flows from it.
<< = use this Node's color for Flows to it.
Flows from the Node inherit its color:
:Node-name #Color >>

Flows to the Node inherit its color:
:Node-name #Color <<
Flows both to and from the Node
inherit its color:
:Node-name #Color >> <<
or
:Node-name #Color << >>
Color Precedence Rules
For Flows:
A Flow’s color can be set by four different methods.
There is a strict precedence to how a Flow’s color is resolved, from most specific to least specific:- If the Flow's line in the source data specifies a color, use that.
- If the Flow’s Source Node declares that Flows from it should use its color, adopt the Source Node's color.
- If the Flow’s Target Node declares that Flows to it should use its color, adopt the Target Node's color.
- Use the Default Flow Color as set in the “Colors” control panel.
(This could be set to a general rule indicating all Flows should inherit their colors from their Source Node or Target Node, or a single specific Color could be set for all Flows.)
For Nodes:
A Node’s color can be set by two different methods.
Each Node’s color is resolved as follows:- If there is a Node Definition line specifying a color, use that.
- Use the Default Node Color as set in the “Colors” section of the controls.
(This could be a single Color entered by the user or a color chosen by SankeyMATIC from a color Theme selected by the user.)
« Back: Labels & Units
Next: Exporting, Publishing, Sharing »